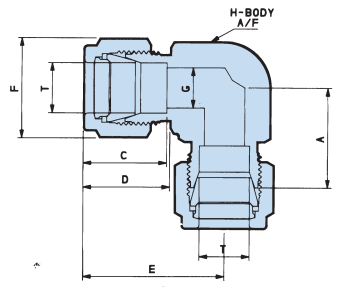
This guide on how to assemble twin ferrule compression fittings is based solely upon our Ringlok OD compression fittings range.

Ringlok Tube Fittings
Ringlok is the trademark name for our twin ferrule compression fittings.

Ringlok Imperial And Metric Charts
This Waverley Brownall blog post features:
- Pre-assembly instructions (Tools and considerations)
- Assembly instructions
- Links to re-assembly instructions
Caution: Use only Waverley Brownall’s Ringlok components for safety and reliability.
Mixing components may not provide reliable joint assemblies and leakage could occur.
Pre-Assembly Instructions For Twin Ferrule Compression Fittings

Step One: Hold the pre-assembly tool in a vice, then assemble the joint to the assembly instructions found here.

Step Two: Remove the tube assembly from the pre-assembly tool.

Step Three: Insert the tube assembly into the fitting body and then follow the re-assembly instructions found here.
Do you require assistance in assembling compression fittings?
Please contact us on enquiries@waverleybrownall.co.uk
PRE-ASSEMBLY TOOLS AND CONSIDERATIONS
Pre-assembly tools: These tools are manufactured from hardened Maraging Steel and are designed to withstand repeated assemblies. Pre-assembly tools can be used as an aid to make sure joints are correct.
Assembly tools must be kept clean and lubricated at all times.
Pre-assembly is recommended: Assembly can sometimes present difficulties, especially if the compression fittings are going to be used in confined spaces. Thick wall tubes or standpipe adaptors may also present problems. Pre-assembly ensures the fittings placement and installation to be correct.
Pre-assembly will reduce installation stresses when tube sizes exceed 1/2″ (12mm) OD .
Assembly Instructions: Ringlok Twin Ferrule Compression Fittings
Assembly Instructions for Ringlok Twin Ferrule Compression Fittings.

1. Cut the tube to the required length, leaving the ends square to the tube axis, remove all burrs.
2. Insert the prepared tube into the fitting assembly, ensuring the tube end fully enters the fitting, engages in the abutment diameter and that the nut is finger-tight.
3. For 1/16″, 1/8″, 3/16″ OD and 3mm, 4mm OD size fittings, tighten the nut 3/4 of a turn from finger-tight to complete the assembly.
All other sizes require use of 1 1/4 turns from finger-tight.
For blanking plugs, tighten the nut 1/6 of a turn from finger-tight.
Re-assembly: Ringlok fittings can be dissembled and reassembled many times without impairing the efficiency of the joints. Re-assembly instructions can be found here.
To enquire about our Ringlok twin ferrule compression fittings, email us today on

